This post, featuring Strawberry Honey Butter, is sponsored by Ball® Fresh Preserving.

Nearly every summer since 2012, I’ve partnered with my friends at Ball® Fresh Preserving to share recipes and spread the love of canning. Some years, they asked me to develop a few new canning recipes. Other years, I’ve trekked to New York or Indiana to offer canning demos.

This year, they’ve handed me an assortment of recipes. The task? Make and document the process of creating a preserve at home. As someone who is directing the bulk of her creative energy towards gestation right now, I am grateful they didn’t ask for anything more ambitious. Still, I know I will be proud to have some preserves from this season on the shelf later in the year, so I’m very happy to do it.
The first recipe they asked me to tackle was one for Strawberry Honey Butter. As someone who loves a good fruit butter (particularly one that involves honey!), I was delighted to take this on.
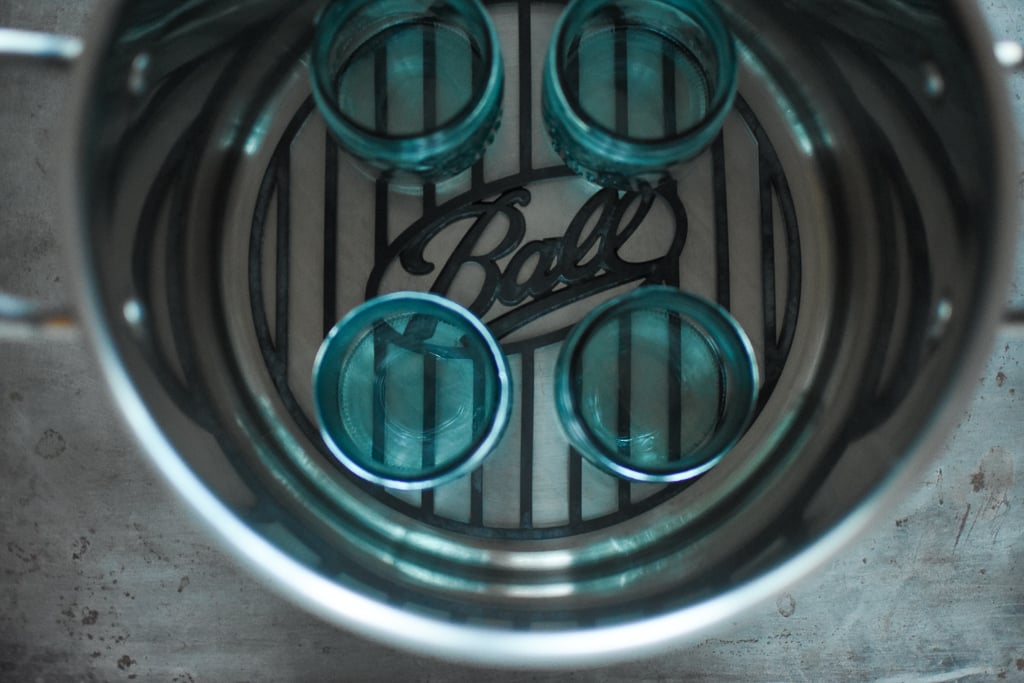
You start by getting your canning pot set up. I used the canning mat from the new Preserving Starter Kit and four of the new Vintage Aqua Jars in their half pint size (these jars really are so pretty). These Collector’s Edition mason jars feature a vintage design, color and logo originally produced between 1910 and 1935. The Ball® Aqua Vintage Jars are available in Quart, Pint and Half-Pint Sizes.

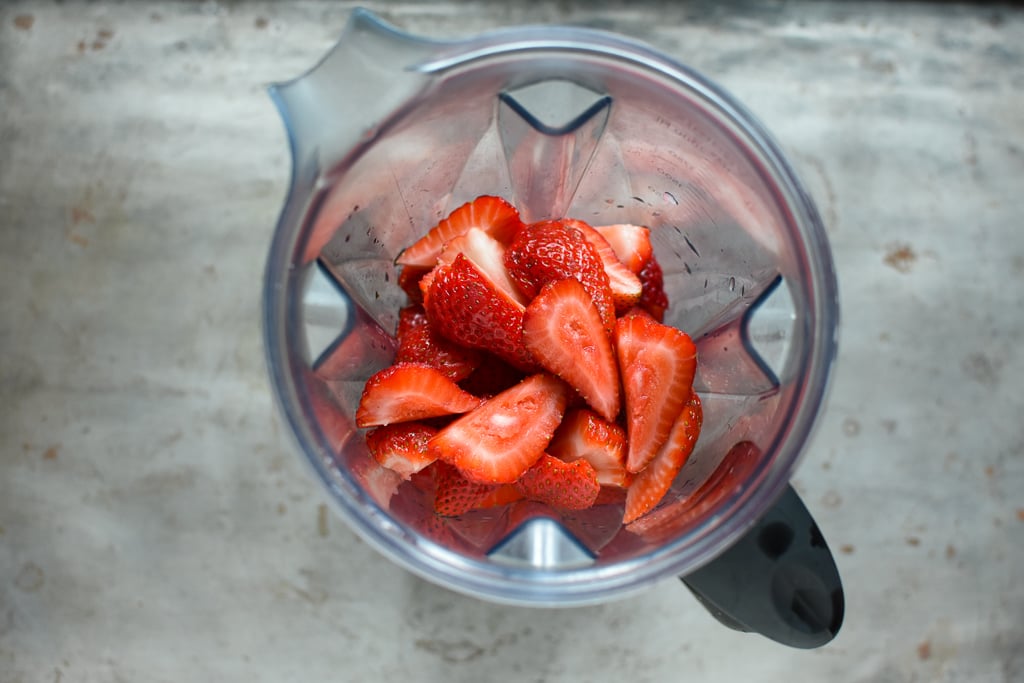
While the jars heat, you wash three pounds of strawberries, remove the hulls, and cut them into quarters. Then, you place the prepped berries in a food processor or blender and puree them until smooth. When you like the consistency, you pour the puree into a pot that’s large enough to contain the butter during a pretty vigorous boiling phase.

Then you add the rest of the ingredients to the puree. They are honey, sugar, bottled lemon juice, vanilla, and salt (see below for the exact measurements).

Once you have all the ingredients in the pot, you put it on the stove over medium-high heat and bring it to a boil. Once it reaches a vigorous boil (all the while making sure to stir frequently), reduce the heat to medium-low and cook at a low simmer for 60 to 90 minutes.
If you have a splatter shield, position it on top of the pot while it cooks down. It’s a great tool to use for any stove top butter, as it helps contain the mess and keeps errant splashy bits from landing on hands and feet.

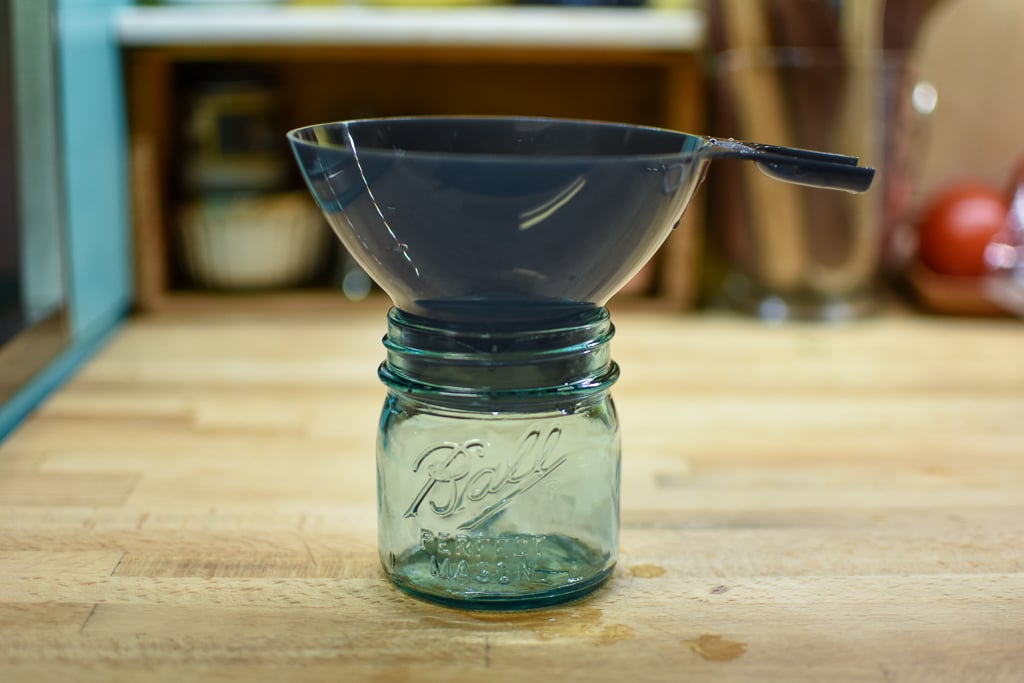
Once you like the consistency of the butter (it should stand tall and proud in the bowl of a spoon), it is done. Position a clean, wide mouth funnel in one of your previously prepared half pint jars and funnel in the butter, leaving 1/4 inch headspace (find all the necessary tools here).
Make sure to use your bubbling tool to remove any trapped air bubbles, as fruit butters are particularly prone to catching those little air pockets. Wipe the rim, position a new, clean lid, and screw on a ring until it is fingertip tight.

Return the filled and capped jar to the canning pot. Repeat this process, filling, bubbling, wiping, and closing one jar at a time, until all four half pints are full. Bring the canning pot to a boil and process the jars for 10 minutes (making sure to adjust your processing time if you live above 1,000 feet in elevation).

When the processing time is up, turn off the heat, remove the lid from the pot and let the jars stand in the pot for an additional five minutes (this allows them to cool more gradually, which helps prevent siphoning and can also help develop a more robust seal).
Remove the jars from the canner and set them on a folded kitchen towel. Let them sit undisturbed for 12-24 hours so they can fully cool and seal. Before storing, make sure to check that the seals are firm and unbending.
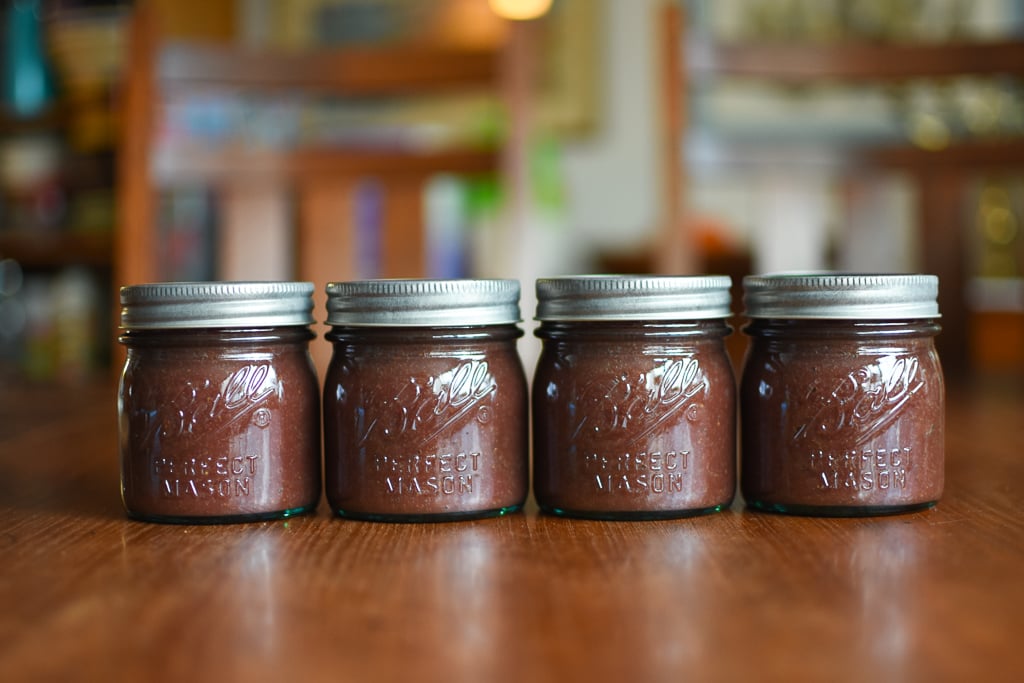
This gorgeous butter is really rich-tasting and has a gloriously deep berry color. I like it dolloped onto a scone or stirred into plain yogurt, but it can be used anywhere that you enjoy jam (it would make an excellent bar cookie).
And if you like strawberry butter, don’t miss these three! Strawberry Hibiscus Butter! Strawberry Maple Butter! Strawberry Rhubarb Butter!
Disclosure: This post is sponsored by Ball® Fresh Preserving as part of a compensated partnership. All thoughts and opinions are entirely my own.

Strawberry Honey Butter
Ingredients
- 3 pounds strawberries, washed and hulled
- 3/4 cup honey
- 3/4 cup granulated sugar
- 1 tbsp bottled lemon juice
- 2 tsp vanilla extract
- 1/4 tsp salt
Instructions
- Prepare boiling water canner. Heat jars in simmering water until ready for use. Do not boil. Wash lids in warm soapy water and set bands aside.
- Puree strawberries in a blender or food processor until smooth.
- Combine strawberry puree with remaining ingredients in a deep pot set over medium heat. Bring mixture to a boil stirring frequently to prevent scorching, lower heat and simmer until mixture is very thick, about 60-90 minutes, stirring frequently. Any foam produced by strawberries will disappear with the cooking process. Strawberry butter is finished cooking when it holds shape on a spoon.
- Ladle hot butter into a hot jar leaving a ¼ inch headspace. Remove air bubbles. Wipe jar rim. Center lid on jar and apply band, adjust to fingertip tight. Place jar in boiling water canner. Repeat until all jars are filled.
- Process jars 10 minutes, adjusting for altitude. Turn off heat, remove lid, let jars stand 5 minutes. Remove jars and cool 12-24 hours. Check lids for seal, they should not flex when center is pressed.

The link to the actual recipe is broken. 😞
Sorry about that! I’ve updated it to the correct link.
It looks like the link to the original recipe on the Ball Home Canning website is now broken/not available. Is this recipe on their new website? https://www.freshpreserving.com/blog?cid=strawberry-honey-butter
I made this strawberry butter last summer and it was delicious!
That is the recipe! Thanks for letting me know that the link is broken. I will go and fix it right now.
What about canning JUST honey butter?
Unfortunately, you can’t can dairy.
I just finished making this. It definitely took the full 90 minutes to cook down to the correct consistency. I doubled the recipe and it made 10 – 1/2 pint jars and a 1/4 cup extra that i threw in the refrigerator. Tastes delicious and brightly colored with a unique flavor from the honey.
Made a batch of this Strawberry Honey Butter today. My three pounds of strawberries gave me a total of 2.5 pint jars – so two are cooling and the half-pint will end up as refrigerator jam, if it survives the family tonight (it won’t).
Cannot wait to try it with the homemade bread I’ve got rising.
Thanks for sharing this Ball recipe, Marisa!
I think it will be delicious with your homemade bread! So glad it spoke to you!
I often make my fruit butters in a crock pot. Is there any reason I shouldn’t do that here?
I’ve made strawberry butter in both slow cookers and on the stove top, and I find that with this particular fruit, it does better with a shorter cooking process rather than a longer one. The berry flavor stays fresher.
Any reason this fruit butter couldn’t be made as written with plums or other fruit in lieu of strawberries?
You could easily adopt this same approach with any number of different fruits.