Regular Food in Jars contributor Alex Jones checks in today to show us all how to make gorgeous, homemade grassfed ghee. Looking at these pictures, I can almost smell the nuttiness of the melting butter! -Marisa
During my years as a local foods buyer for the CSA at Greensgrow Farm and Fair Food Farmstand here in Philly, I brought home my share of produce that was still delicious but no longer sellable. Those leftover, cosmetically damaged, or too ripe to sell fruits and vegetables kept my fridge full. My proximity to occasional stashes of “seconds” even spurred me to learn how to preserve those goodies for later use.
I’m no longer bringing home flats of half-moldy strawberries to pick over or sacks of so-ripe-they-burst figs on a regular basis. But my work with local farms and food makers still yields the occasional bounty of perishable product that can be turned into something delicious and shelf-stable.
The most recent foodstuff in need of a little TLC came from my friend Stefanie, cheesemaker and owner of Valley Milkhouse and one of the two area cheesemakers (along with Sue Miller of Birchrun Hills Farm) with whom I run the CSA-style cheese subscription Collective Creamery.
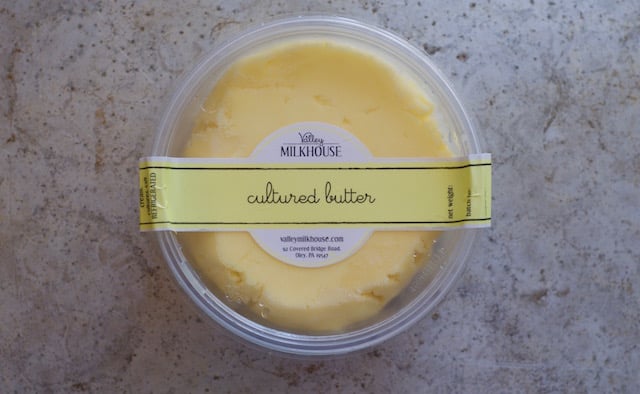
I’dd gone up to Stef’s farmhouse in the Oley Valley, about 90 minutes northwest of Philly, for an evening meeting and spent the following day helping out in the cheese room. When I was ready to head back to the city, she sent me on my way with a very special treat: a half-full five-gallon bucket of cultured butter that was a little past its prime — but the only ingredient I’d need to make a big batch of homemade grassfed ghee.
I spent the next few days working my way through that butter, which had simply sat around in the cooler too long and developed some off-flavors, and ended up with several quarts of grassfed, organic and biodynamic ghee. (Stef sources cream for Valley Milkhouse’s butter exclusively from Seven Stars Farm, makers of heavenly cream and yogurt whose products are unparalleled.)
Since then, I’ve been getting to know and love this cooking fat. It adds amazing flavor to seared mushrooms and fresh veggies, and it’s my new high-heat go-to when I’m cooking up pastured steaks or chops from my Primal Supply Meats Butcher’s Club package. In addition to its purported health benefits, it’s simply delicious, whether you’re spreading it on a slice of sourdough toast or searing off dinner.
When sourcing butter for making ghee, look for the best quality you can find — ideally from 100 percent grassfed cows, made by a local farmer or artisan who could use your support, and unsalted. (Valley Milkhouse’s butter is lightly salted, so my batches weren’t technically traditional, but much of the salt is extracted with the milk solids as you remove them during the cooking process, so the final product I made doesn’t taste salty.)
Where I live, cultured butter from Valley Milkhouse or sweet cream butter from Oasis at Bird-in-Hand cooperative in Lancaster County are great grassfed options, as is Trickling Springs butter made in south central Pennsylvania. Brands like Kerrygold or Organic Valley’s Pasture Butter are good choices if a local source can’t be found where you are.
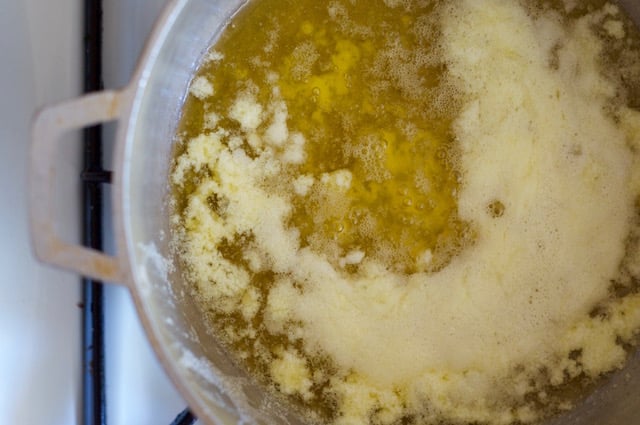
To make homemade grassfed ghee, simply heat your butter over low heat and bring it to a gentle simmer. You’ll want to keep an eye on the pot, but you can pretty much set it and forget it, checking occasionally to skim foam from the surface and make sure the heat isn’t too high or too low.
As you simmer the ghee, milk solids will sink to the bottom and slowly brown. How brown you let them get is a matter of preference, but getting the milk solids to caramelize is part of what separates ghee from clarified butter. You’ll know this process has started when your kitchen is filled with a buttery, nutty aroma.
Foam will rise to the surface of the ghee as the moisture is cooked out. You can carefully skim this off with a spoon. If you are using unsalted butter, you can toss these milk solids with cooked grains or vegetables to add a rich browned butter flavor (if you use salted butter, the milk solids may be too salty for this purpose and should be composted).
Keep simmering until you see that the milk solids at the bottom of the pot have browned when you spoon back the foam on the surface. The eight-ounce tub of cultured butter in the photo became deep golden ghee with well-browned solids on a very low simmer in about 90 minutes, but the time will vary depending on your stove and the type and quantity of butter you’re using.
Once the solids have browned to your liking, remove the pot from the heat and skim all of the foam from the surface. Strain the mixture through a very fine mesh strainer or a few layers of cheesecloth. Don’t forget to squeeze the cheesecloth to get that last little bit of golden ghee out of there.
Decant your ghee into a clean, dry jar; once it cools completely, it will solidify and turn an opaque bright, buttery yellow. If you’re doing a larger batch, I suggest filling a few cute jars like Weck tulips or decos or Ball Elite half-pints for gift giving. Ghee is the new jam!
Once you try making your own ghee, there’s a good chance you’ll be hooked on the rich flavor, myriad uses, and exceptional qualities that it brings to your recipes.
Have you had a chance to taste homemade ghee? Have you tried your hand at making homemade grassfed ghee before? How do you like to use it? Share with us in the comments!

Grassfed Ghee
Ingredients
- 8 ounces grassfed butter unsalted
Instructions
- Place butter in a small saucepan over low heat. Melt the butter and bring it to a gentle simmer.
- Simmer the melted butter until it smells fragrant and nutty. Milk solids will sink to the bottom of the pot and foam will begin to form on the surface. Do not stir.
- Once the butter smells nutty and rich, check beneath the foam layer to see if milk solids have browned (this may take as long as 90 minutes). Browning is a matter of preference; you can stop the process when the milk solids are just golden brown or leave the pot on the heat until they turn darker.
- When the milk solids have browned to your liking, remove the pot from the heat and skim off all of the foam on the surface of the ghee.
- Strain ghee through a few layers of cheesecloth set in a fine mesh strainer into a clean, dry jar. Cover and store at room temperature for up to three months or in the refrigerator for up to a year.


To stir or not to stir… I have read/viewed so many instructions and while essentially the same, some say do not stir, some say stir, some say remove the foam as it forms and some say remove it after or just strain it out. Some say boil/simmer, some say ladle it out before boiling, etc, etc. Can you clarify (no pun intended) this for me?
Thank you.
Hey Steve,
While I haven’t researched this, I did not stir and did skim off the foam as I went along. That gave me a good result — other methods may as well but I can tell you that this one made a tasty finished product.
I make ghee on a regular basis but my budget puts “On Sale Gold” in the pot much more often than Kerry Gold. One problem that I’ve experienced and you might want to warn your readers about is an ‘explosion’. Several times when I heated the butter at too low a temperature the water in the butter would pool at the bottom of the pot where it would turn to steam instantaneously. Molten butter volcano. Clean up is exhausting.
People ask why I make my own ghee when I can buy it. Ummm, because I have more control over where the butter comes from? Indian colleagues have been thrilled that I even use ghee but the next statement is inevitably, You make tarka? Well yes, when I cook Indian I do. But I feel sad that the Indian community seems to have lost sight of the high heat, deeply beautiful and in their culture actually sacred fat that is ghee.
I made a mistake a while back and the solids in the ghee I was rendering got rather dark. I thought I had ruined it. But then smelled the amazing browned butter nose. Oh! Wow! I had browned butter ghee. Very different flavor and now I make both.
So much free ghee!! What a score!
I gave some of the finished product back to her and another friend — #blessed!
Do you have a citation for the “salt is concentrated in the solids” thing? Other than anecdotal/experience? I get that things get saltier as you cook them down because the moisture evaporates and therefore what’s left has more salt, proportionally, but I don’t quite understand why the salt makes such close friends with the milk *solids* specifically. Thanks.
Michele, Heidi at 101 Cookbooks suggests using the milk solids in this way with her post about making ghee, which specifically calls for unsalted butter. I found my milk solids rather salty with the Valley Milkhouse butter I used; that butter is washed in a salt brine as its final rinse (and considered “lightly” salted).
My (uneducated) guess is that the salt sticks with the moisture/milk solids because it’s water soluble, but I don’t really know!
This is so helpful! I made some ghee last week, but I couldn’t find a recipe as specific as this that showed snaps of those little brown specks at the bottom of the pan. And I didn’t realize it could take up to 90 minutes. So glad I read this. Thanks, Alex and Marisa.
Glad to be of service! I kept the flame super low under an aluminum pot, and the dark solids photo you see there was when I finally pulled it from the heat — but you wouldn’t want to let it go longer than that. Happy ghee making!
I’ve made ghee’s cousin, clarified butter. Will need to give this a try – it sounds delicious.
I’ve only tried it once and of course did it all wrong.
Used salted butter, not grass fed, just the store garbage. Cook it too long or too high. Even though I strained the solids out the ghee was brown and didn’t taste right. At least it didn’t seem like what it was supposed to end up being.
Thanks for the tutorial and the photos. I may just try this again.
Ah that’s a bummer! I definitely recommend trying it again with some grassfed butter and reeeeally low heat (a heavy-bottomed pot will help too). Good luck!