Back when I first started canning, I didn’t know that you were supposed to remove the rings from your jars once they were cool. This led to some very frustrating moments in which I went to open jars and found them stuck fast. An irritating situation, indeed.

Now that I remove the rings for storage, as well as to check the seals and rinse the jars (if there was any pesky siphoning during processing), I don’t face that sticky issue. However, while I was working my way through those older jars, I discovered an easy trick to get those stuck-on rings. It involves a bowl, filled a third of the way up with warm water.

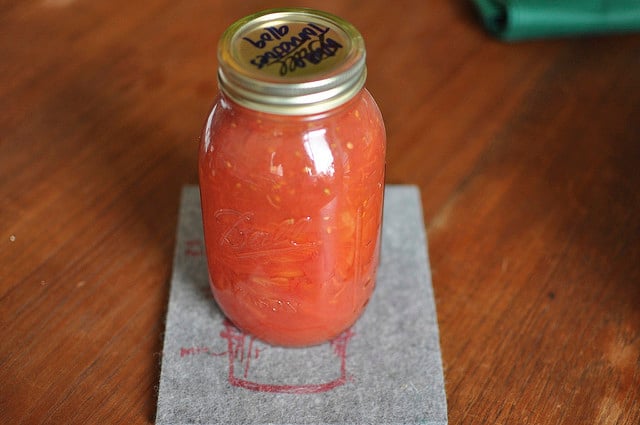
You simply invert the jar in the bowl and let it sit for 15 to 30 minutes. Check the ring every so often, eventually it will turn easily.
Now, before you ask, here are the reasons you store the jars without rings.
1. To fully check your seals after processing.
2. Without a ring in place, you will know if something inside your jars has gone off. When bacteria grows it produces gas. Those gases will eventually loosen your lid and will make it easy for you to know that that is a jar that should be discarded.
3. Keeping rings on the jars can actually damage the quality of your seal, as it applies unnecessary pressure to the lid.

Very helpful. Thank you.
You’re welcome!
I have tried everything. putting in hot water followed by a tool to help opening jar. wd40 did not work. I wanted to try to cut off ring but cannot find anything. if so do you know the name so I can order one. later today I am going to home depot to see if they have a tool to help me
If it won’t come off after soaking and WD40, you might need to consider the jar a lost cause and throw it away.
I’ve let my jars sit for 24 hrs out of the canner, now I can’t get my rings off ?
Have you tried soaking them upside down like this post suggests?
I was always taught not to stack anything home canned also. My Dad made my Mom these special shelving units especially for the stuff she canned they weren’t fancy but they did the trick. She canned everything. I was a teen before I had store bought catsup. You could use the laminated pieces of wood they sell for the shelves that go on the wall with the “L” shaped brackets and couple new pieces of thin patio bricks to hold your shelf up. Just an example. You can use almost anything. I have a couple of bookcases with adjustable shelves that I use. Good Luck!
Thanks so much for this tip – it worked like a charm – and the lids remain sealed. This was my first-time canning experience and I forgot to loosen the bands after cooling. When I went to remove the bands to put the decorative tops on the jars – most were too tight to unscrew without breaking the seal. I tried a jar opener on one band – and it immediately compromised the seal. This warm water trick was a life saver – and it does take about 5 minutes in the warm water to work.
Great blog!
I guess I’m lucky since I haven’t ever gotten sick and didn’t use a recipe for the first five years (in the mid ’90s) I canned into used Price Club sized peanut butter jars, with the stock lids… but that was then this is now. For the last couple of years I’ve been following recipes and once done, loosening the lids… but I prefer to leave them on the jars for stacking and a place to keep them. In the past, if one was stuck, I would use a butter knife around the top (not the under side) of the jars and they became unstuck nearly every time I used that method.
Hi there…thanks for the tip! My husband canned pickles from most of the cucumbers from our garden and we can’t open some of the jars now. I’ll try this tip to loosen them. Now we know to remove the rings after jars cool for our future canning adventures
Thank you! I have this problem and I just googled how to get them off, and yours was the first that came up! going to go try this right now!
thanks again!
This should be the first thing that shows up when you search “hard to open pressure canned jars.” Everything you said makes so much sense. More guides to canning should place a greater emphasis on removing the ring when done canning. Its obviously dangerous, but when you have to use a can opener to pry off that impossible lid there is a problem. It leaves you with a mangled useless lid and a questionable jar of whatever. I just cannot believe it took me until page four of a google search to find this post. Thanks much for the instruction and explanation. I appreciate a great explanation, and now know that I am lucky that I didn’t die of botulism or some weird sickness because my lids were obviously too tight.
I know this is a relatively old post and all, but I have a novice question: what do you mean by “ring”? Are you talking about canning jars that have two-piece lids, one relatively flat lid that goes over the mouth and the other a ring (aka the “ring”) that threads onto the jar and holds the flat piece in place? Or is it some kind of other mystical ring one unfamiliar with canning wouldn’t know?
I am talking about standard mason jars that have the two-piece lids. There’s the flat lid and the ring that holds the lid in place. Sometimes, if you store the jars with the ring on, it can get stuck. And so you have to unstick it sometimes.
This sounds bad, but I just thought I took the rings off because I was too cheap to buy enough for all the jars I have. 🙂
Thanks for the information.
Great site….just found you today, thanks to a friend, who lives in California! (I live in Maine). I am new to canning, and find its a wonderful way to Prep……There are many ,many things I still need to dcan , but will feel much safer, now that I am not going to keep those rings on………Happy Canning!
I recently discovered this blog (which is awesome, by the way), so I’m reading back through old posts. I hope you still check comments on older ones because I have a question relating to this:
“2. Without a ring in place, you will know if something inside your jars has gone off. When bacteria grows it produces gas. Those gases will eventually loosen your lid and will make it easy for you to know that that is a jar that should be discarded.”
I started canning a couple of years ago, and I have always wondered… I do remove the rings from the jars after cooling. However, will stacking jars cause the same problem for the jars on the bottom?
That is, if you do have a contaminated jar with bacteria growing, will the weight from the jar on top prevent the lid from loosening and giving you an indicator?
I still stack my jars because I just don’t have the space for a single layer, but I always think about that each time I open a new jar.
In an ideal world, jars aren’t stacked during storage. I totally understand being short of storage space. If you need to stack your jars, you should try to stagger them so that each jar in the second row is sitting on top of two jars. However, if there’s something growing in the jars, you’ll know even if the jars are stacked. The seals will still break or at least be far weaker than you think they should be.
I have never heard this, but I’m so glad I did! Have only been canning for about a year, and am still learning so much. Love your site!
I was taugth not to take the rings off, as that can disturb or foul the seal. I still live by that philosophy…also, it gives me a natural place to store rings that does not take up extra space!
I can see I am in the minority here, but I leave the bands on for protection of the seal edge, as well as for transport. Just make sure you don’t tighten them down too much.
A true story related to me by a farm gal who has canned for years – She once found that mice had gotten into her jars and had pryed the lids back. One mouse actually worked it’s way into a jar and drowned in the jar.
Repeat – Keep the bands on. Just don’t over-tighten them. Lids are purposely made nowadays so that you can tell if jars are gassing without looking at the edges. They are purposely made with a concave design that becomes even more concave when they seal properly – if you see it’s opposite, a convex lid, or even a flat lid, it’s bad. Throw it out.
I’ve canned just about everything BTW – veggies, juice, milk, meats.
Great Post! We sell our homr canning at a Farm Market every Saturday during the summer. I have discovered that People (customers) are quite upset if the rings are not on the jars! ANd they won’t buy!
They think that there us something wrong if the rings are missing.
barb
Thanks for the tip! I constantly leave the rings on my jars. Why? I think because my Mom always did. I remember her taking the jar and tapping it against the edge of a step to get them unstuck. As I have found out from others, this can actually break the glass under the rings, but she never did. I guess I just learned my one new thing for the day!
wow, i’ve been canning for four years and had no idea you were supposed to remove the rings! so good to know!! i’ve always just run warm water over the top of the jar for a minute or two and that has loosened it too. same concept as your bowl of water.
Had to laugh! (While agreeing that this is an excellent post.)
We, too, put the rings back on for transport.
All these great ideas don’t help much when you find a cache of antique jars left from grandmother that the rings have rusted onto the jars! We use every one of those techniques, then graduate to WD-40, and finally just VERY carefully cut them off the jars! Then the threaded areas get a good scrub with bicarb…
We are VERY grateful that the cache we discovered were at least empty jars! Beautiful and well worth the effort of cleaning up the quarts but mostly half gallon blue jars. They are sooo nice for canister kind of storage.
Sometimes home canned jars can be tougher to open than commercial ones, because it’s not the seal that’s making them difficult. It’s the fact that some of the product in the jar has bubbled over and has formed a sticky seal between the ring and the jar. That’s why the water is so helpful, it helps dissolve the stuck-on gunk under the ring.
I actually put on rubber dishwashing gloves to un-stick stuck jar lids. It’s the same principle as using those flat rubber disc things people used for a while — the rubber grips the lid and gives just enough traction to let you exert more torque on the lid. So I just put on my gloves and try unscrewing the jar again — it works for all but the most extremely stubborn cases.
Using a thick rubber band works just as well. Put one rubber band on the lid and maybe one on the jar, if it is slippery. That way you have a good grip on both parts. Works slicker than a whistle!
That’s a great tip. Thanks Bernie!
I love my JarPop. I bought it years ago when I was single and living alone and had to get a neighbor (named Kilo no less) to open a jar of capers for me. It breaks the seal of even the toughest jars in a second. Anyway, even though I store without rings, they can still be a bit tricky, this just pops them right off. I’m too impatient to wait. A one note gadget but one I use suprisingly often.
My mom taught me to take rings off to store, but to put them back on lightly to travel. That way if they get bumped in a car ride the lid won’t open by accident. Does it really help or harm to put them back on?
Renee, the danger is in tightening them too tightly. That’s what can disturb the seal. As long as you’re putting them back on lightly, you shouldn’t have any issues.
THANK YOU! I’ve always wondered why one would remove the ring and your explanation makes so much sense. I have tons of jars in my pantry with stuck on lids and have often been frustrated trying to get them off…great trick with the warm water! Even today I was wrestling with a jar of peaches!
Now THAT was a very helpful post! I have a whole passel of jars here on my counter that I need to label and stash in our tiny pantry, so the first thing I will do is remove the rings! I’ve read that it’s good to do, but never really understood why…until now.
Also: you could not have chosen a more perfect bowl to illustrate how to un-stick the collars!