Homemade Yogurt in Mason Jars

April 26, 2012(updated on October 3, 2018)

My personal yogurt consumption goes up and down. I’ll go for weeks eating it every day and then suddenly, I’ll stop and a month will go by before I have it again. I have no good explanation for this. It’s just the way things happen in my edible world.

I’m currently is a very pro-yogurt phase. I’ve been eating more than a quart a week and started feeling guilt about consuming so many plastic containers. It was time to restart my homemade yogurt habit.

thermometer in milk

Truly, making yogurt at home couldn’t be easier. I stop doing it out of laziness, but once I force myself back into the routine of it, I’m always glad (sounds like so many things in life, doesn’t it?).

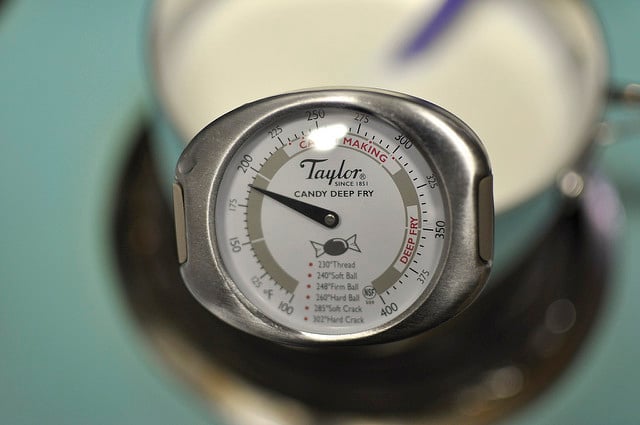
The first step is to heat the milk to 190-200 degrees F. You can use any milk you’d like. I made this batch using six cups of whole, un-homogenized milk (because it’s not homogenized, the cream will rise to the top, leaving me with a gorgeous, rich upper layer).

cooling milk

Once it reaches that temperature (take care not to let it boil), you want to cool the milk down to 120 degrees F. I do this by filling my sink with cold water and placing the pot in. The water helps reduce the temperature quite rapidly, so don’t walk away during this step.

pouring milk

Once it has cooled to 120 degrees F, whisk two tablespoons of yogurt into the milk. Over the years, I’ve tried using various amounts of yogurt to start my batches and I’ve actually found that the smaller amounts work better than larger amounts. A tablespoon for every 3-4 cups of milk just seems to work perfectly.

There was also a time during which I stirred some dry milk into each batch of yogurt I made. I’d heard it made for a thicker yogurt. In the end, I decided it had no discernable positive impact on the finished product and, if anything, left me with lumpy yogurt.

ready to incubate

Once you’ve stirred the yogurt in, pour the inoculated milk into your jars. You’ll see that my jars aren’t entirely full. There’s no reason why you can’t fill them up to the top. I just didn’t have enough milk in the fridge to make a full batch. However, I filled the jars evenly because I wanted to ensure that they’d process at the same rate.

A note about the starter yogurt you use: Make sure to use a yogurt that you like. There are a number of different yogurt bacterias out there and they all turn out slightly different yogurts. Splurge on the starter in order to make something you’re happy with.

cooler for yogurt

There are a number of ways you can keep your yogurt warm during it’s process. Some people have little machines. Others pop the jars in the oven with the light on. I’ve even heard that you can use a slow cooker or hot pads.

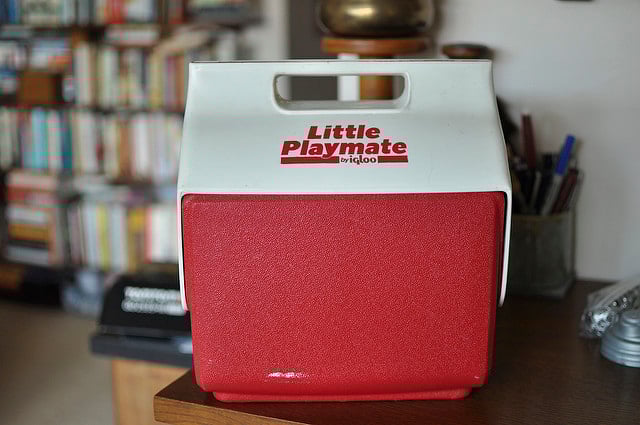
After trying all those methods, I’ve come to prefer using a cooler for this step (hat tip to the Frugal Girl for introducing me to this method). This Little Playmate holds two quart jars perfectly. I got it at a thrift store several years ago for a couple dollars, which has always pleased me.

jars of milk in cooler

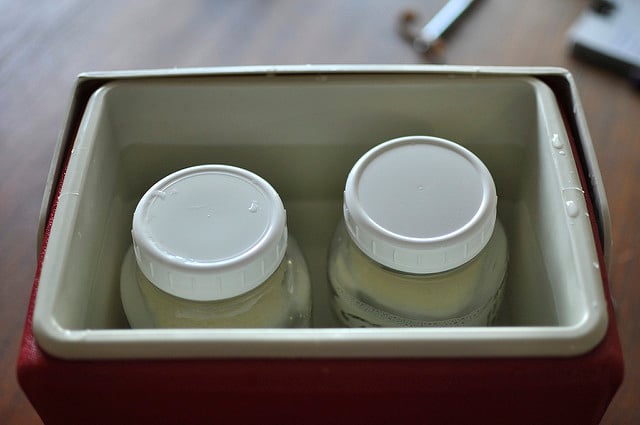
Place your filled jars into the cooler and add hot tap water until they’re submerged, but not floating. You want the water to be around 120-125 degrees F. I’ve found that this is exactly how hot my hottest tap water is, so I use that. Makes life easy, too.

homemade yogurt

Once the jars are in the cooler and it’s filled with water, close it and tuck it out of the way for 6-7 hours. You can go as long as 8-9 hours, but keep in mind that the longer it sits, the more pronounced its tang will be. When I was working, I’d often start a batch of yogurt just before I left the house in the morning and let it process all day. It made for a tart yogurt, but I loved the simplicity of it.

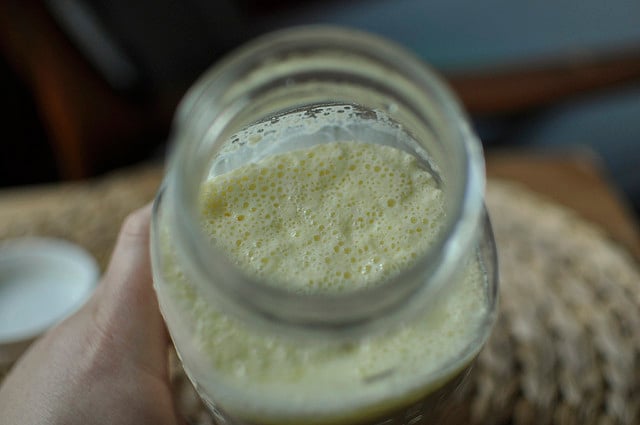
When the time is up, remove the jars from the cooler and place them in the fridge. Use your homemade yogurt like you would any other kind of yogurt. If you’re interested in transforming your yogurt into a thicker product (along the lines of greek yogurt), all you do is strain it. Well Preserved has a good post on that, as well as suggestions for using up the resulting whey.

For those of you who regularly make yogurt, do you have any tips to share?

Sharing is caring!

Posted in

Leave a comment & rate this recipe

If you enjoy this recipe, please do give it a star rating when you post a comment. Star ratings help people discover my recipes. Thank you!

Your email address will not be published. Required fields are marked *

181 thoughts on "Homemade Yogurt in Mason Jars"

  • Hi I am very confused as to how this works… Now why do you have to add store bought yogurt to homemade yogurt???? How did the first yogurt get made without using yogurt??? I was hoping to learn how to make yogurt without the use of yogurt. Can this be done? I am new to all of this just find it odd that homemade yogurt is made with store bought yogurt. I am into a phase of making everything from scratch and this is so odd to me that it seems all the recipes I come across on the internet call for store bought yogurt to start your batch of homemade yogurt. If you could shine some light on this I would be so grateful thanks so much. Oh and if you have a recipe that is without store bought yogurt wow that would be so wonderful:)

    1. You need something to introduce the correct bacteria to the milk, so that it will become yogurt. The easiest way to do that is to use some store bought yogurt. You can try to culture your milk without yogurt, but chances are it will just spoil.

    2. If you want to make yogurt without using other yogurt you’ll need to purchase yogurt culture, which is live bacteria. It’s generally more expensive and my results have never been as good as with a couple of tablespoons of purchased yogurt. Don’t try to make yogurt culture the way you make sourdough starter, with bacteria from the air. That’s not the bacteria you want for yogurt.

    3. I have tried this method for making my yogurt.

      1) Buy the capsules of bacteria, store them in the door of your fridge. DO NOT FREEZE.

      2) I use old baby food jars (with lids) in the crockpot. I use the same hot water method, that keeps the temp regulated to 115.

      3) Almond Milk and other milks DO WORK, if one does not want to use dairy. Found this out when doctors thought I might have dairy-protein allergies (caseinate, not lactose). It won’t set as quickly or as hard. However, it does work. 1 capsule is 1 tsp. so use 2 of them.

      4) Grab 2 beach towels, when on end of season sales, Sew them together, then make an “envelope” cover for the crock pot. This makes it easy enough for you to not have to use the base. Just the “crock” bowl and lid.

  • have you ever used a thermometer to make sure the temp stays constant in the cooler? i’m new to all of this and I just started trying out different ways of making yogurt. I’ve been using a thermometer to monitor the temp and maybe I’m being too cautious. ? prepping milk now to try out this cooler method.

    1. I actually never use a thermometer. I just get the water to the right temperature and trust the cooler to keep it relatively warm.

    1. It’s more that you’re creating a blank slate for the yogurt bacteria to work. For best results, you should heat the milk before making yogurt, even if it’s already been pasteurized.

  • hello. I have been using this method for a few months, and while it gets thick, it never seems to get that tartness. what am i doing wrong? I heat up to 180, cool down to 120, add the yogurt while in the pot. i fill the jars, and then settle them in a large stockpot filled with hot tap water. i try to keep it at the 120 temp for a few hours by tuning on the heat very low for a minute. then i just let it cool. yesterday, i kept it in the water bath overnight since i started in the late afternoon, and still no tartness. i also add some vanilla and a bit of splenda before jarring – could that be the problem? thanks for any suggestions.

    1. The yogurt has to be above 110 degrees for a minumum of 6 hours. That would produce a mild yogurt. A tangier yogurt could be achieved by processing for 6-12 hours. Again, the milk mixture needs to remain around 110 for that duration of time. It might work better to use a cooler or crockpot rather than a stockpot.

  • Where in the world can you get un-homogenized milk? I assume you mean pasturized, but un-homogenized, just what I’ve been wishing for.

    I’ve just started making yogurt, and tried my slow cooker, which is a little different from most, in that it is rectangular, and does hold more jars on a rack. But it’s too short for quart jars. The lowest setting holds well at ~110 degrees. But the cooler sounds a lot easier.

    Also, I thought that 120 degrees would kill off the bacteria. Most say to cool to 110 to 112 before inoculating. Are you sure your milk is really that hot?

    I tried the dry milk, too, and I’m also unhappy with the consistency. I’ll try without, and maybe add some agar agar to make it thicker.
    Thanks for posting!

    1. Most raw milk is sold in its un-homogenized state. And in my area of Pennsylvania, often we can get pasteurized milk that isn’t homogenized. And I always shoot for 120 degrees and haven’t had any issues. But you can go a little lower if it worries you.

      1. Thanks for the quick response!
        I’m in the Southern Tier of NY, close to the PA border, though it’s probably not the area you are. Still, can you give me a store name? Or is it via a CSA, or local farm? I always thought small farmers were missing a great opportunity to provide a unique product if they could find a way to pasteurize, but not homogenize their milk. Glad to hear someone’s doing it.

        I drank raw milk when I was a kid…a looong time ago. In the winter, instead of driving the car, we would take the pony and sleigh to the neighbor’s farm for fresh milk. I’m afraid I wouldn’t trust raw milk from an unknown source, but I loved the thick head of cream on that milk.

        We had a little device that I wish I could find now; just a jar with a lid attachment with a shaft and blades which, if you pushed on the knob at the top of the shaft would spin the blades and make whipped cream, or, if you did it a little too long, butter. Maybe it could be done with a blender, but I’ll bet it’s just too fast.

        If 120 works for you, then I won’t worry so much about getting such a precise temp as 110 to112 degrees. That’s a bit of a pain.

        1. I buy my raw and pasteurized but not homogenized milk through the Fair Food Farmstand at Reading Terminal Market. It would be a haul for you, but you could call them and find out who their suppliers are.

  • I like draining out the whey through a cheese cloth wrap for between 24 and 48 hours to make a thick unripened cheese. Better known as Lebneh in the Arab world. You can salt it by mixing in the salt with a fork before storing it containers. Serve it in a small bowl with 1 or 2 tablespoons of extra virgin olive oil on top and pinch it out of the bowl with pieces of fresh pita bread. Enjoy it with a cup of tea for a traditional Arab breakfast.

  • I am new to your site and am in love already!! Do you think if you put the crockpot in a large cooler that would help keep the temp consistent?

    1. If you’re going to use a crock pot, there’s no need to use a cooler. A crock pot maintains its own temperature.

  • Fantastic tutorial but you left out a crucial step, you have to be sure to sterilize any utensils and jars you are using because otherwise you will be growing harmful bacteria as well as the good kind.

    1. It’s really not that big of a concern. If you consume your yogurt in 2 weeks and you culture it at the right temperature then the yogurt cultures will crowd out any other bacteria.

      Don’t think to use dirty containers or anything like that, but there’s no need to sterilize containers for yogurt so long as they are cleaned and dried properly before using.

    1. You can use any size you have. I have a little lunch-sized one that I got at a thrift store that I use.

  • Thanks for this recipe. I was about to buy a yogourt maker but decided to try myself using mini mason jars. It is difficult to find yogourt that is plain with no additives, no pectin, and made with whole milk for my baby. Anything flavoured has too much sugar 🙁
    Will let you know how it turns out.

  • I’ve been trying for a while to find a method that will keep the temp consistent enough for a good texture. Finally found it this weekend! After seeing some people used their crock pot, I tested mine and the “warm” setting holds it perfectly at 112 F. I put it on the timer (my crock pot isn’t fancy enough to have it’s own, so I use one of those ones people have for lights when they’re not home and Christmas trees and such) for 7 hours and this morning woke up to PERFECT yogurt!

  • Of all the methods I found on line, this was the most straightforward and it worked! My variation was that I poured the milk into the mason jar and set the jar into the pot of water to heat it (like a double boiler) and it worked great. My yogurt could be thicker, but it’s perfect for making lassi and it tastes really good. Using a cooler with hot water was a brilliant idea. No additional energy needed, like with a heating pad or leaving the oven lit. I am so happy with the result! Thanks for a brilliant tutorial.

  • I finally made yogurt for the first time and knew I wanted them made & stored in jars so your blog was the first place I wanted to go to. I watched other methods but yours were easy to understand and great photos. I made granola many times and it seemed perfect to have homemade yogurt now. I love having a “Homemade Pantry” and just makes me want to say “I will never buy yogurt again”!:-)

      1. 🙂
        One jar came out runny but the other two were thick so I’m not sure if it’s because I didn’t mix in the plain yogurt enough before pouring in the jars. I’ll use it for smoothies.:-)

  • I made it yesterday with the heating pad method. I used one of those large tin cans that Christmas gift popcorn comes in. Put my jar of yogurt-y milk in the center, wrapped a couple of towels around the jar in case the heating pad had any hot spots, then wrapped the heating pad around that. Tucked in the whole thing with a couple of thick beach towels. It worked! I’m going to experiment with a few of the other “keep warm” methods here because I want to “set it and forget it” (like, overnight, or while I’m at work) but I’m paranoid about leaving a heating pad on and (God forbid) causing a house fire. (I know, I know….) I like the one involving 110 degree water inside a couple of picnic coolers!

  • For me it’s a matter of experimentation:
    Found that one cup of ‘old’ yogurt per gallon of milk works well.
    I found a small burner on my electric stove will keep the incubation temperature of a covered pot big enough to hold 4 quart ball jars at 110 when it’s set near LOW.

    SO?
    1) Place four quart ball jars with “inoculated milk” into the pot
    2) Fill that with 110-120 degree water up to the level of yogurt on the jars
    3) Put a colander upside down on top of the jars
    4) Place a thermometer in a hole in the colander that’s near the center of the jars.
    5) Put the lid on the pot
    6) Set that on the small burner on my electric stove set near LOW.
    7) In two hours the yogurt is done.

  • After reading this I’m going to try to make some. My kids love those drinkable yougurts like DanActive. How long do you let it sit for it to be drinkable? Thanks.

    1. Drinkable?
      One could simply add milk to existing yogurt until it reaches the desired consistency OR shorten the incubation time from (in my case) two hours to one. Just be sure to keep the thinner yogurt cool else it will eventually thicken.

  • I make yogurt all the time. I can’t justify buying all those little plastic containers. I buy whatever yogurt I want, Chobani, other greek yogurt, whatever… for my starter. I can’t just waste the leftovers from the large container, so I freeze the remainder (after I’ve made a batch) in ice cube trays and them freeze the cubes for another fresh start. After they are frozen, I pop them out of the trays and store the cubes in a zipper type freezer bag. Works great!

  • Hey! Ive been making yogurt every week for awhile. The best method I know to incubate it is two heat some water very hot, about tea making hot, and out it into one half gallon mason jar, or two quart mason jars. Then put it on a suitable table or counter where it can stay for seven hours, and arrange the yogurt jars around it so they are touching. Then put a heavy wool blanket over them, and tuck them in nicely. Maybe two blankets if you are unsure yours will insulate enough. This has never failed me, and is the way people would incubate yogurt before electric ovens and plastic coolers existed. Water is great for holding temperature!

    Hope it works for yall.

  • My husband makes our yogurt using an 80 oz margarine tub and powdered milk. He simply heats just over 4 cups of water in the micro for 4 min., adds 3-4 cups of milk powder, adds 1/3 cup no-cal sweetener, adds yogurt culture from previous batch, adjusts the temp with ice cubes to 115 or so, and puts the lid on with a probe thermometer stuck through a small hole he drilled in the lid. He puts a heating pad in our Playmate cooler with a clay “bread warmer” on top and a beach towel on top of that. He puts the tub in the cooler and wraps the towel around the container. He sets the heating pad on low with thermometer alarm set at 117. When the alarm goes off a couple hours later, he turns off the heat and lets it sit for another 5-7 hours, puts it in the frig, and the next morning we have wonderful yogurt. Easy as pie! Blessings and good eats!

    1. Been wanting to use powdered milk as I am 47 miles from any store and would like to be able to use dry milk substitutes in a ‘pinch’.
      However, I understand that it must be a certain “type” of powdered milk —Would you mind telling us the brand and ‘type’ of powdered milk that you use? Are there any other adjustments to the process one must make when using this method?

      Thank you for your attention to this question!

  • I LOVE IT! I made my first-ever batch of yogurt last night. My ice chest is larger, so I sat a large pot inside the cooler and filled that with hot water so my jars would have the water up to the top and I wouldn’t have to fill the entire cooler with water. Though I left it for 8 hours, it wasn’t a tangy as I had wanted. So I will leave it longer next time. Thanks for sharing and inspiring! How long will a batch keep?

  • Thanks for sharing I will have to try this at home tonight since I am out of yogurt and have a full gallon of milk left. 🙂 I too get addicted to yogurt for a couple weeks and then just stop for some reason. I am now at that point where I am pro yogurt! I just had a question – How long does the yogurt keep in the fridge for? Thanks again. 🙂

  • Thanks. This worked great. I did two small changes. To make this yogurt SCD, I culture for 24 hours, checking to make sure the temperature is correct, by heating up the surrounding water jars as needed. It makes a lactose free yogurt. I also have a small cooler that fits in a larger cooler and will hold the temperature overnight.

  • I tried this with 2% and poured it into half-pint jars, which happens to be the perfect serving size for my family. I forgot about the yogurt until right before I went to bed, but it was perfect when I pulled it all out of the cooler! This is my new go-to yogurt recipe.

  • I am also an on-again-off-again yogurt maker. Today I am on again. I have a Revel 18- quart Roaster Oven with three inserts in the top that are perfect for making yogurt. I put hot water (2″) in the bottom of the oven and turn it to 150 degrees before I start heating up my milk. After cooling down the milk and adding the starter, I divide the mixture between the three inserts, turn off the oven and put the lid back on. I cover the whole oven with a thick towel or blanket and let it set overnight. In the morning–voila! Perfect yogurt!

    1. I forgot to mention to remove the metal inserts while the oven is heating up so they won’t be too hot for the cultured milk.

  • Hi,
    In this hot summer, I have been leaving my yogurt on my back porch and the yogurt comes out perfect! (live near DC)
    A tip…I have a double oven so in the winter I put the yogurt in the upper oven with the light on and put the lower oven on to 200. No need to keep it on all day, but periodically to warm it up..and if you forget…won’t be overheated.
    I also start with everything warm…jars, starter at room temp, oven preheated..
    And for an extra special treat..try making with 1/2 and 1/2 (very low carb this way!)
    Barbara

  • Thank you so much! I made this on Friday and it turned out INCREDIBLE! Totally smooth, amazing yoghurty texture. I used four cups whole and two cups low fat (in Ireland this is around 1.5%) and Glenisk whole natural yoghurt. I got distracted and went to a party so I actually left it somewhere warm for 14 hours instead of 8. 🙂 It’s perfect. Absolutely delicious. Thank you!
    Two questions:
    1. How long does it keep for? I’m guessing as long as normal yoghurt?
    2. Can you use the yogurt you made as the starter for the next batch?

  • Thank you for simplifying this for me! I’m new to your website and love it. I didn’t have a small cooler, so I transferred the warmed milk to a crockpot set on warm and left overnight.
    In the morning I had thick, Greek yogurt like yogurt ready to be flavored. Delicious! Since I used whole milk, it’s like eating ice cream!

  • Have you tried it with Soy milk? Cows milk gives me a bellyache, but I really don’t like the texture of store-bought soy milk…so when I saw this post, I got kind-of excited about the prospects! 🙂

      1. When my husband has cow’s milk it really messes him up, but he can eat yogurt made from cow’s milk and it actually helps him with his digestion. The yogurt making process actually eats up the lactose and of course the probiotics helps in digestion. If you really want to make soy yogurt you need to buy cultures designed specifically for soy and other alternative milks.

    1. I’ve not tried it with soy milk before. However, if you search for homemade soy milk yogurt, you’ll find some instructions.

  • The timing of me reading this post is impeccable. I have seen this method before and even purchased the ingredients but never made the yogurt. Then I read another blogger (it could have been facebook actually) and they had a link to your post. I had it bookmarked to read later but hadn’t read it yet. I was obsessing over the size cooler I had. I didn’t want one too big and all I have are the large size that we use for camping.

    It just so happened that last night that I looked up and noticed the little coleman personal8 cooler was just sitting up there a lonely. I thought to myself, “surely, this could work”. After all, I did see Alton Brown do something like this with a smaller vessel and a warming blanket (I really didn’t want to use a warming blanket as I don’t have one already). Thankfully, last night I started reading the post and saw that you used a small cooler too! Coincidence? I think not!

    Thanks for the inspiration! As a bonus, I went to my local New Seasons Market for some “good” milk and found some great options. Both local! Woo Hoo!

    As a side note, I hope to have the opportunity to meet you when you come to Portland (I live on the other side of the river in Vancouver)

  • I finally worked up the courage to try making yogurt tonight. Thanks for making it seem so easy! I have mine resting in a warmed oven (Once it was preheated to the lowest temperature I turned it off and opened the door until it came to 120, then put the jars in and closed the door). I actually used Greek honey flavored yogurt as my starter. I read a few other comments on other sites that said they had success with this, so fingers crossed.

  • Marisa,

    I made my first batch of yogurt Saturday and it is simply amazing. I never knew how easy it really is to make. This will definitely not be the only batch I make because we eat so much yogurt around our house. I am curious though, to know how long the yogurt will stay fresh in the refrigerator. Any thoughts? Thanks so much and keep blogging! You are a treasure on the net…

  • Quick question…can you freeze the starter yogurt so you will have some for the next time you make a batch (I read this on another blog)?

    1. I’ve not done that myself, so I can’t speak to whether it works. I’ve heard that too, though.

    2. LDB, yes, I freeze my starter and the three batches I’ve made with thawed starter have come out fine. Just try to make sure the freezing process is as quick as possible–cool it off in the fridge first, and then put it in the coldest part of your freezer.

  • Thiz is fantastic! I make Greek yogurt at home regularly and find that my half pint jars filled to 6 ounces are perfect. I’m in the camp that adds powdered milk to each batch to thicken it rather than straining afterwards and the end result is comparable to Fage brand Greek yogurt in ready to grab sized servings. I also let mine sit in my cooler for about 15 hourts to get that nice and tart flavor. Agoes so perfectly with a drizzle of honey or some fresh berries. I have one jar marked as starter, to remind myself not to use up the whole thing, but to save part of it for the next batch.

    1. I want to try to make yogurt but I don’t want to have to drain it in order to get the consistency of Greek yogurt. How much powdered milk do you add to your yogurt and at which step? Thank for the help 🙂

  • I loved this method. It worked beautifully for me. The only place I went wrong is in how long I strained it in order to end up with something closer to “Greek” yogurt. The time range suggested in the linked to article was much too long. After the minimum time suggested I had something along the lines of cream cheese – which will be put to good use.

  • Thank you for sharing this process. I have been scared to try making yogurt but your explanation of the process sounded so easy I gave it a try. It came out a bit runny but I think that is because I used some 2% milk with whole milk. I will have to try all whole milk next time. I am happy with it being my first try and all.

  • I’ve found it nearly impossible to keep up with a vegetable garden, or learn to sew, or even do more than one canning project a year. However, yogurt making is so quick and easy even I can keep up with it. I make a quart of yogurt in a mason jar a couple of times a week. My three-year old and I consume most of it. I use a super-simple method: heat until there are bubbles around the edges of the milk in the pan and it is steaming a good amount, hold for a few minutes, cool to 110 degrees, poor into mason jar, mix in a spoonful of yogurt from previous batch, cover and let rest in the oven with pilot light overnight. Stove is so old it doesn’t have a light inside. Also, I turn the oven on low for about 2 minutes to warm it up before putting milk+yogurt mixture in.

    Question: my yogurt sometimes has pockets of very unappetizing curdled bits. Has anybody had experience solving this problem?

    Thanks for all the yogurt-making wisdom on the blog. Very helpful!

    1. I got curdled bits too when I started making yogurt. I used to let it cool on the stove and never stirred it. I find that if you stir it often as it heats, and again when it cools (I now cool in a cold water bath), then there are no curdles.

  • I’m a cyclical yogurt maker, too. Over the years, I’ve found that powdered probiotics from a natural foods store are a great way to culture yogurt, as the bacterial potency and strain are guaranteed…and it spares you the irony of having to buy yogurt to make yogurt. I currently use Solaray Multidophilus, which contains l. acidophilus, l. bulgaricus, and b. bifidus bacteria. Produces a nice clean tang; also great for culturing cream for butter.

    I used to be able to get it in plain powdered (uncapsulized) form, but now seem only to find it in capsules (it’s not that bis a big deal to pop a capsule open). I use about 1/2 teaspoon per quart of milk, but should probably play around with the quantity. If I made yogurt more often, I’d probably experiment with a few different bacterial strains (most commercial yogurts have some l. thermophilus in them).

  • To make a thicker product in a way that uses up the whey, I sometimes stir in dry steel-cut oats and let them absorb whey and enzymes. They break down a little, as they would during cooking, but they stay more toothsome than rolled oats would.

    It’s a different sort of food than plain yogurt, but it makes for a more balanced portable snack, in my experience.

  • Oh, I’m so glad my method is working out for you, Marisa! I make a gallon of yogurt almost every week using this recipe and I’ve been doing it for about 4 years now.

    I’m still kind of amazed every time I take the jars out of the cooler and find yogurt…it’s so awesome.

    And I LOVE that my trash production is lower this way. Yay for Mason jars!

  • The cooler method works great for me. I have been using a heating pad in the bottom of the cooler instead of hot water to maintain a temperature between 95 – 110 F. On sunny days I take advantage of the free energy by setting the cooler on the deck where it will get sun for the 8 to 12 hours needed for the culture to do its thing. We like our yogurt on the thick side, so I make one gallon batches in a large pot that gets strained to remove about three pints of whey, then transfer into pint jars. The whey goes into bread dough, compost, or dog food, but never wasted.
    Making yogurt is almost foolproof and flexible. The important points are making sure the temperature of the milk gets up to 180F (for safety) and is then cooled below 120F (so the live culture survives). I let the culture set for 8 to 12 hours with similar results. As long as you maintain a cozy environment between 90 – 110 F, everything should come out tasty.

    1. They’re made by Ball, so most places that carry canning products will have them. They range in price quite a bit. I’ve seen a box of 8 of them go for as little as $3 and as much as $16.

      1. I just ordered them off Amazon with free super saver shipping. It was about $11 for 2 boxes of 8 lids (one of each size).

    2. You can get them at Walmart for cheap. Never pay $16 for those lids…they aren’t near that much at Walmart.

  • I make yogurt about once a month in a big, 1/2 gallon jar that fits the white plastic lids. It just about holds a half gallon of milk, which works out because we don’t really drink much milk. I heat the milk in a double boiler (mixing bowl over a stock pot) to prevent scorching. I use a small cooler filled with hot tap water to maintain the temperature over night.

    I’ve found that the peak temperature you bring the milk up to has a huge effect on the thickness of the final product. Below 175 F the proteins don’t denature enough- the yogurt comes out runny. Still good in a smoothie or lassi though. One batch I made got up to 195F came out really chunky and was almost inedible. I generally try to hit 180 F. This seems to give optimum texture using whole milk and Chobani as a starter. I often whisk in a packet of dry, nonfat milk. It definitely makes the yogurt thicker. I add the starter at about 115-120F. I find that I need a fresh starter after every fourth batch.

    The little bit of whey that collects on top of the yogurt is perfect for starting any type of lactic fermentation- sauerkraut, kimchi, pickles, etc. A 5% salt brine works for almost any veggie.

  • You…are…my…hero!!! I cant think a thing like this exists within the net! Its so real, so straightforward, and much more than you dont sound like an idiot! Last but not least, somebody who understands the best way to speak about a topic devoid of sounding like a kid who didnt get that bike he desired for Xmas.

    1. Great post. But you should delete the above comment. It’s spam & could lead your readers to a site that could endanger their computers.

  • I wanted desperately for Frugal Girl’s cooler method to work for me, but I failed miserably 3 times – I think the cooler I used was too big, my house is too cold and my thermometer was not responsive enough.

    I now use Little Miss Cruciferous’ method in a soft sided cooler that fits 6 quart canning jars perfectly and bought a better thermometer. I use whole milk (it’s actually 4%!) heat to 180F, cool to 105F, whisk in starter, pour into jars, fill other jars with boiling water, make it before bed, and come next morning I have 3 quarts of firm yogurt.

    I used a single serving of plain Dannon yogurt as my starter, and I now just use some of last week’s batch to make this weeks batch.

    My BIL’s father, a central European immigrant, just puts a pitcher of milk on the counter, whisks in some starter, and 2 days later he has yogurt he puts back into the fridge. (*!*)

    1. I’m so glad you found a method that works for you! I imagine that your BIL’s father uses a different starter culture. There are some varieties that will turn into yogurt at room temperature. Two days seems like a long time, though. That might make me nervous.

    2. I usually turn a plastic storage box on its side, wrap my containers in a towel and put them in it with a space heater aimed at them from about 12 inches away (usually overnight)
      I could never get the cooler method or the oven method to work for me either, I live on the cold central coast :[

    3. The hot water method in a cooler works for me, and I have a cold house. But, in addition to the hot water bath I also wrap my cooler in a Bulgarian Wool blanket. I suppose you could use any wool blanket, but the Bulgarians often wrap their yogurt in wool to incubate, so I use my Bulgarian blanket around my cooler. Works every time.

  • I tried making yogurt in jars and it wasn’t consistent, then bought the little Salton maker but only the middle jar would set, so I spent $60 on a yogurt maker from King Arthur Flour and have used that for several years. I always drank skim milk and the directions said to use some powdered milk to thicken it. I never had any trouble with it being lumpy. I guess I’d have to make a lot of yogurt to make the price worthwhile, but couldn’t make good yogurt with jars. Some days it was thin and other days I could bounce it off the wall.

  • Thanks for the straight forward tutorial. I’ve been wanting to make homemade yogurt, but haven’t had much luck. I think I’ll give your method a try!

  • This is something I’ve been meaning to do more often for years… No excuse, right? It’s easy, it’s cheap, and it’s healthy!

  • With 4 kids, I make yogurt all the time. I bought a culture from Cultures for Health that will ferment at room temperature (except in the winter when I put it in the oven with the light on). All it requires is pouring milk into a mason jar, adding 1 tbsp of yogurt for each cup of milk, then covering with a cloth for 12 hours.

  • Great idea with the mason jars and cooler. I had been using my crockpot and wrapping it in a wool blanket. Always works, but then i have to transfer it to jars. I am gonna try your way for sure. A friend’s mom taught me how to make what she called “makat”. She was albanian. Anyway, she used half & half instead of milk and OMG!!!! it is sooooo good and as thick as sour cream.

  • I have never been so excited to try anything ever. As a total yogurt fiend (who is saddened by the plastic containers I’m constantly recycling), you may have just changed my whole life.

    Question: Can you use a bit of your own resulting yogurt as the starter in the next batch?

  • Yeah, so I swiped my parents 1960’s yogurt maker (it was a wedding gift but they’re divorced now so I figured they have no attachment to it!) and repurposed it in my own kitchen! The mercury thermometer is long gone, so I scald the milk (I’ve been making it for years and just gauge it by feel), let it cool a bit, add a small amount of sugar (to feed the cultures according to the directions–which are still around!), and yogurt starter (a tablespoon or so saved from the previous batch), pour it into the cups and cook away! I remember my mom starting it at night, and it being finished by the morning so we kids could eat it for breakfast with whatever jelly was in the fridge. (Now, I prefer it with lemon curd…..)
    I can’t wait to try out your technique with some of my Mason jars!
    I’ve tried to market this method to friends as “You can make yogurt without electricity!”…provided you have a gas stove and matches, that is! How easy (and green!)

  • As much as I loathe single-task kitchen gadgets, I am absolutely in love with my yogurt maker. I was also feeling the plastic guilt (especially since my city did not recycle that type of plastic until last year!) and really just want more control of my food.

    I’ve never seen this method and think it’s awesome! Thanks for sharing.

  • My experience has been that my yogurt is much happier if I cool the milk to 111 degrees Fahrenheit; if I leave it hotter, it is thin & watery. Too much heat kills the culture. I also use my 1940’s era Wedgewood with pilot lights as a yogurt incubator –crack the oven door open with a wooden spatula handle, and it’s the perfect temp (~111 F). I would highly recommend testing your incubating heat source for the proper temperature BEFORE using it. And yes, homemade yogurt is the best. I usually make a gallon at a time; the clean, sealed jars keep very well in the fridge until i am ready to open them. It helps that I put a layer of clean waxed paper on the opening before I seal it as well.

  • I’ve been thinking that I need start making my own yogurt, so I’m definitely excited to see such a great discussion of everyone’s different methods! I even have a tiny cooler hiding away in the laundry room, just waiting for mason jars…

  • Would love to win one of the those Recaps. Such a big fan of food in jars (generically), and now I’ve found your site. Yay!

  • I make my yogurt in quart jars– I actually heat the milk in the jars, so less clean-up. It takes a bit longer, but is easier for me.

  • I go in yogurt streaks too, so I keep some that I froze in mini-muffin tins on hand. I keep my yogurt warm in a large coffee thermos. It holds one quart of yogurt perfectly (and that’s how much I tend to make at a time), and always comes out great.

  • Marisa… Can I please just tell you how much I LOVE, LOVE, LOVE your blog. Seriously. I’ve been reading for years, and every time there is a post that really resonates with me I say to myself, “GOSH, I love this blog!” and this is one of them. I love the idea of being self-sufficient, and making yogurt was something that I tried once before, and was looking into trying again. Thanks for motivating me!

    The recipes, stories, recipes, humor, recipes, advice and last but not least RECIPES are my favorite and many are my “go to” ones now… Thank you for all that you do, and for taking the time to make such an amazing blog that makes a huge impact on my life.

    1. Ginny, thank you so much for the lovely comment! I’m so happy to hear that this blog resonates with you!

  • I have been drinking flax milk lately and so don’t generally have cow’s milk in the house. Do you thunk flax milk will work? I would really like to make my own yogurt. Or maybe almond milk?

  • I make yogurt the same way, except I use two of the hot/cold packs that you can microwave for the heat. Love all the great comments with tips. I will have to try using the smaller containers to see if it sets up better. I’ve found that it’s difficult for me to make yogurt in the winter (in Colorado) because I can’t keep it warm enough, but it works really well other times of year. Good thing I switch to oatmeal in the winter.

  • If you’re making yogurt using store bought yogurt as a starter, be sure to buy yogurt with active/live cultures. If they are live the container will say so. Much of the sugared fruit flavored yogurt doesn’t have live culture.

    I also make mine in jars but I usually use jars that commercial food came in originally and save my real canning jars for, well, canning.

  • Thanks for posting. I’ll definately be giving this a try soon. I like being able to make common fridge items at home and know EXACTLY what’s in them. Preservatives just aren’t my thing.

  • I use unflavored gelitin in my home made yogurt (slow cooker method) it makes it thicker. I love to add fresh fruits and honey. My kids love to help make this and enjoy eating something they made from scratch 🙂 Also sometimes I add mango/peach necture it’s think and adds wonderful flavor.

  • Do you know if yogurt can be made with soymilk? The yogurt starter would be non-soy, but I love the taste of vanilla soymilk.

  • Marisa…this is such a great post! Never made my own yogurt, but made my own ricotta cheese last year and found that to be easy enough, so I’ll have to try this. I like the heating pad or crockpot version as well.

    Also, for those who may have backyard chickens or am I the only one here(?), they love yogurt and if you strain it, that water is good for them and most any other animals you may have…pour it over the dog’s food or let the cat just lap it up…very little goes to waste here…between my dogs, cats, chickens and potbelly pig…we keep things recycling!

  • I am in the experimental stage with making yogurt. I haven’t hammered out the perfect way for me yet but I love reading what works for everyone else while I keep trying. I have had varying results over the last several months of trying. I am always intrigued when someone talks about how ‘easy’ it is… Not my experience so far!! Ha! But I am going to keep trying until I can be one of those people… Love the post!

    1. Thank goodness I am not the only one who is not finding it “easy”. I have had more batches of slightly warm milk than I care to admit. Pilot light did not work, heating pad did not work, yogurt machine sometimes works, etc. I am taking a break – but may try once I can get milk at my farmers’ market that opens in a few weeks.

      1. I would suggest checking the temperature (over a few hours) of your heat source–111 F is the best temp for yogurt. any higher can kill the cultures.

  • I do it almost exactly the same way, except my cooler is a soft insulated bag, so I pour boiling water into two MORE canning jars and add them in there to keep the temperature up. And of course, you didn’t mention the best part — adding a spoonful of homemade jam to the yogurt when you eat it. Lately I’ve had pear-ginger yogurt, pomegranate yogurt, peach butter yogurt, habanero-berry yogurt…

  • What a great way to make yogurt! I am going to keep my eye out for an appropriate size cooler and give this a try. I have a yogurt maker with the small jars, but I like the idea of having it in the larger canning jars. Thanks!

  • I make yogurt a couple of times a week this way. It is so good and I use it in everything. I’ve found that if I drain the starter yogurt ( 2-3 tablespoons in a coffee filter and one of those one cup melita things for about 1/2 hour or so) my yogurt is a little firmer.

  • I once had an oven with a pilot light – tucking the inoculated milk in there overnight made perfect yogurt Every Single Time and was by far the easiest method I’ve ever tried. I’ve tried others since then, but they all have temperature control issues and are more complicated.

  • Hmm… I always strain my yoghourt (I like it thick!) so I never bothered pouring the milk into jars first — generally I pour it into a cast-iron pot (it holds the heat really well!) to leave it to work. After reading Karen’s comment, though, I wonder if my yoghourt might just turn out thicker if I made it in smaller containers? Something to try!

  • I’ve been making my yogurt in the crockpot for a while. Do you find that this is less runny? Crockpot yogurt tends to need a filter through cheesecloth after process…

    1. The yogurt I make this way isn’t super runny, but the consistency also has something to do with the yogurt you use as your starter.

  • I always make my own yogurt. It’s so easy! I use a electric heating pad (like the kind you’d put on a sore back). I set my jars on it, wrap them with a towel or two, then invert a large pot over them. The heating pad goes on low for 6-8 hours. The only issue I have, is that today’s heating pads turn themselves off after an hour, so I only make yogurt when I’ll be around to turn it back on.

  • I use canning jars to make my yogurt as well. However, I have switched to a strain that cultures at room temperature. Since, like you, I can go for weeks at a time without eating yogurt, I’ve started freezing a bit of the culture for my next batch.

    1. I’ve been intrigued by those room temperature starters. I’ve meant to order one for the longest time.

  • Is it me but I have a hard time making homemade yogurt. It comes out thin – perfect for smoothies but nothing else or sometimes doesn’t even come together! I have tried all types of methods (including dried cultures) and still same results. I just put my yogurt machine in the garage. Is there something I’m doing wrong or is that how everyone’s yogurt turns out?

    1. Meg, I wonder if you’re letting it go long enough? You could try straining the finished product to get a thicker yogurt.

      1. I typically let it “cook” for 8 hours but honestly I have had to try 12 hours and it still looks like milk. I do find that if I use whole milk it at least has a smoothie texture. Is this the same texture everyone gets? Perhaps I am too used to commercial yogurt which obviously has thickeners in it.

        1. Maybe your yogurt machine is broken? If it gets too hot, it will kill the active cultures that make it yogurt. Maybe try a different method to see if you can get it to go.

  • I’ve tried making yogurt a few times, but I like this because of the low maintenance… I think I’ll try to get back on that horse soon. That’s interesting about using a smaller amount of yogurt, I wouldn’t assume that but it makes sense. Thanks Marisa!

  • Marisa,

    Thanks so much for the links – and I love the look of your yogurt! Many years ago I was involved in importing those exact coolers to Canada. 🙂

    Like you I also am a major streak-eater. 🙂

    J

  • Making homemade yogurt always seems like something I *should* do, but never try because I’m worried that it will be too hard. Thanks for demystifying the process!

  • I too use canning jars! I’ve been using a tablespoon of starter yogurt per cup of milk. I need to try less! I let mine incubate in a dry cooler with a heating pad in it set to the high setting. I let it incubate for 6 hours. Comes out so thick I can turn the jar upside down and it stays put. Oh and I use whole milk.

  • I also started out the crockpot way but have been doing this way for a couple of years now! I do the oven-light method, as it’s the simplest (no added clutter!) and works perfectly in 8 hours — a work day or overnight. Since it lasts so long in the fridge, I also always use a half-gallon, poured into one half-pint jar and 2 quart jars. That way, I have the small one for my starter without having to remind my family not to finish the yogurt! 🙂

  • Great post as always……..I didnt realize how easy it was to make yogurt……waiting for new canning jars (pint and a half) and then I am doing this recipe.

  • I make yogurt once a week. I use any kind of milk I have on hand, often powdered milk if I am running low on fresh. I add the powdered milk to increase the protein content of the yogurt. I heat it up in the microwave, so easy and you do not have to watch the pot on the stove. My microwave for one quart of milk is always 8.5 minutes to 185 degrees.Then I let it cool to 120 degrees on the counter without any special use of ice or cold water, just let it sit while I do other things. I use the little 4 oz canning jars because they make a nice single serving. I have a yogurt maker, I am into dead easy. If you get a yogurt maker, get one that takes any container, not one that you are forced to use the supplied container. It is only for convenience that I have the yogurt maker, for years I made it in a thermos . 6 hours work best, but often I go a bit longer because I make it at night so it is ready in the morning. Any excess I freeze in small starter quantities. Sometimes I buy milk in larger quantities than I can use while fresh and then freeze half of it for future yogurt making. I love homemade yogurt, it is so much nicer and fresher tasting than the store bought. 1 quart of milk makes 3 cups of yogurt, which is exactly the size of the larger commercial yogurt containers.

  • I love making yogurt! I use a thermos and a jar – very similar to your method but using hotter water (boiling) and colder milk (4C).

    Often I’ll make it entirely from powdered milk, which is easier if I don’t have fresh milk on hand. The trick, if you’re adding powdered milk to fresh, or using entirely powdered, is to add it/make it up and let it sit in the fridge for an hour or so to let the powder fully absorb the water before you make yogurt with it. Adding some to your fresh milk does make for a thicker yogurt – but I certainly made some very ordinary, lumpy and total fail ones before I learnt to let it rest first!

    Another tip is to freeze some of your freshly-made yogurt in an icecube tray, and use that as your starter next time. I use 4-5 icecubes per litre of milk (erm, a quart? I think?), sometimes a couple more for good luck if the culture’s been in the freezer for ages or I forgot to freeze it straight away. Saves going to get yogurt just for starter culture if you happen to go a while between batches. Just don’t use the icecube starters to cool down your milk from hot or you’ll kill the poor things (spoken from experience).

    1. Thanks for the tip on letting the powdered milk sit for awhile to absorb. That’s obviously what I was doing wrong.

  • Hard to imagine a single day without my homemade yogurt… Indian meal is nearly incomplete without it..love this yogurt in jar recipe!

    1. I can get non-homogenized milk at local farmers markets or through the Fair Food Farmstand in Reading Terminal Market.

  • I love this! Will have to try this. I’m daunted by the sterilizing part of one of the sites I was using. I too used dried milk powder once and it was lumpy and the kids did not like it. I need to go back to making it and with fruit on the bottom. I agree, I hate wasting the containers over and over, and there’s only so much re-using you can do with those.

    Can I ask, what are those white lids on the jars? I may have missed the post where you introduced them.
    Thank you!

  • I make my yogurt in my slow cooker from a recipe I got from another blog; Crockpotting 365. I’ve used vanilla yogurt as my starter along with half a gallon of milk. The process is a little time consuming but the end result is GREAT! Nothing you can’t do over the weekend. I actually just made some the other day…..now I just need to figure out how to make it into chocolate fro-yo!! 😉

    1. I do the same thing, and I use the same recipe, too. I never thought to use flavored yogurt as my starter, though. Great idea!

  • I love making home-made yogurt, but like you my consumption goes up and down, and I’d often rather go without than potentially waste yogurt.

    I also usually strain my yogurt post-culture (either after letting it set in the fridge for a while, or immediately) for a Greek-style yogurt, but this makes it keep for a shorter duration as it is less “sealed”… and it doesn’t fit in the jars nicely any more!

  • I make homemade yogurt as well. I heat to 180 then cool to 110.
    I have always used freeze-dried starter with probiotics however, this week,
    I am going to try and use some of my yogurt as the starter. A test!
    I worked at a hospital and was warned years ago by a Nurse to use a yogurt
    machine, so that’s what I’ve always done. I know lots of folks make it using a
    cooler, heating pad, oven, etc., I’m just a big chicken. My machine makes
    7 six ounce small glass jars of yogurt. I only process my yogurt for 6 hours as I
    like it a bit less tart. I never thought I would enjoy the flavor of plain yogurt,
    but I eat it every day and love it. Try it, you’ll like it! 😀

  • I make mine the same way! I’d always read you must use plain yogurt as a starter, but since I always add sugar and vanilla to my milk once it’s scalded, I tried using vanilla yogurt as my starter and it worked great!! When I want to make yogurt, I pick up a half gallon of whole milk and a little cup of our favorite vanilla yogurt, which makes it easy for me!

  • Hey! I make mine in canning jars too! (And I made some last night.)

    I only heat my milk up to 180 degrees, and I’ve been pretty neurotic about it so I’m glad to see you have a range that is higher … that means that I won’t wreck mine if I go a bit higher. That’s a tonne of stress off!

    I was experimenting with all different ways to keep the temp even a few years back, light on in oven, in my slow cooker insert, in a cooler. I was getting such unpredictable results that it was making me insane. Then I read an old hippy on a discussion thread somewhere totally gaffawing all the technique exchanges, saying he simply wrapped his in his duvet for 7 hours (or so).

    I now put mine in small jars — little jam jars as well as 1/2 pint wide mouths set in a plastic basket — after having read that the smaller the containers the better the set and wrap ’em up in a duvet. I rarely have bad results (can’t remember the last time) and there is nothing nothing like the first jar of yogurt, still warm, that I eat first thing in the morning fresh from the duvet (which works like a charm, and every time I think about that hippy, I smile). A small glimpse of heaven.

    I love this post. I think you really capture the joy of yogurt making and the scrumptious results.